
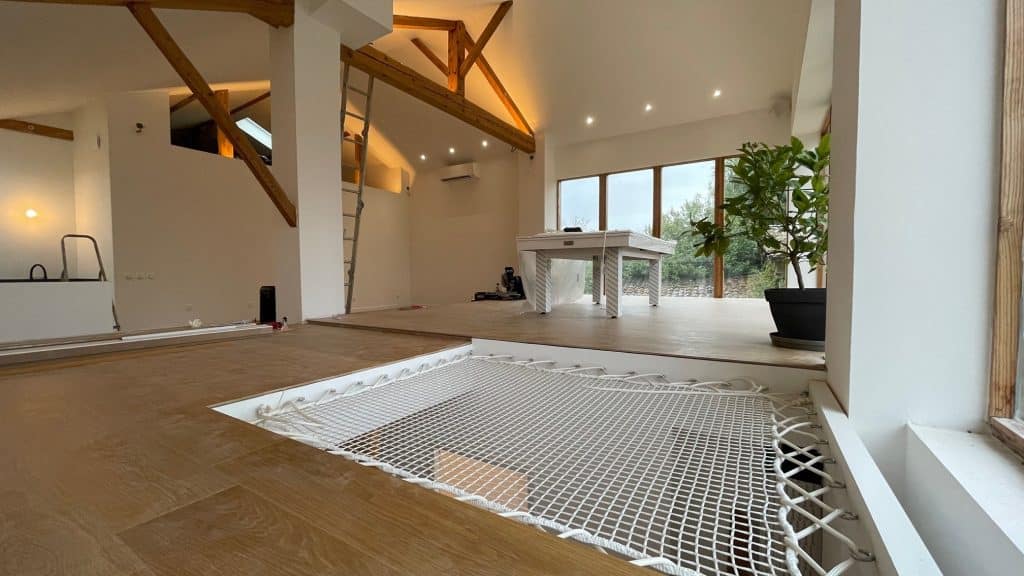
Can you install a custom net yourself?
Often, yes. Many Feelnets customers fit their own mezzanine, patio or balustrade nets with ordinary tools and a free afternoon. Others are better served by a professional, because of the height, the structure or simply peace of mind.
The right answer depends on three things: where the net goes, what it will be fixed to, and how it will be used. A net people will lie, play or walk on carries real loads. The anchoring has to be right.
This guide explains what the job actually involves, which projects suit a confident DIYer, and when it is wiser to call in an installer.
What installing a custom net actually involves
A made-to-measure net arrives ready to fit. The work is less about the net and more about the structure around it. A typical installation runs in five stages.
- Assess the support. Identify what each edge will attach to: a beam, a joist, a load-bearing wall, a steel frame or a tensioned cable. Every anchor point has to take the load, not just hold the net in place.
- Mark and drill the anchor points. Spacing must be even and consistent with the net’s edge. Fixings must suit the material, whether timber, concrete, masonry or steel.
- Fit the mounting hardware. Eyebolts, hooks, tensioners or a perimeter cable, depending on the system you chose.
- Attach and tension the net. Lace or hook the edge progressively, working around the perimeter so tension stays even. Uneven tension leads to sagging in one area and overload in another.
- Test and adjust. Load the net gradually and re-tension after the first few days of use, as fibres and fixings settle.
For a standard mezzanine opening, a capable DIYer can expect to spend half a day to a full day. Complex shapes, high ceilings or outdoor structures take longer.
When DIY makes sense
DIY is a realistic option when the structure is sound, the anchor points are easy to reach, and you are comfortable drilling into it.
Good candidates for self-installation:
- A mezzanine net over a rectangular opening with solid timber or concrete on all four sides.
- A balustrade net along a staircase or landing, fixed to existing posts and handrails.
- A patio or pergola net on a sturdy wooden or steel frame at a manageable height.
- A replacement net going back onto anchors that already exist and are in good condition.
Feelnets designs its hardware with self-installers in mind. Our hook attachment system fits a standard screwdriver and speeds up fitting considerably. Where a side has no load-bearing wall, the steel cable solution creates an anchor line instead.
If you go the DIY route, read the instructions supplied with your net fully before drilling the first hole.
When to call a professional
Some projects are better handed to an experienced installer. Call one in if any of these apply:
- You are unsure what the walls or beams are made of, or whether they can take the load.
- The net is high up. Anything that requires work at height on a ladder or scaffold carries real risk.
- The opening is irregular, curved or spans more than one level.
- It is a commercial project. Hotels, rentals, schools and public venues often need documented installation for insurance or inspection.
- The net will carry children or several adults at once, and you want certainty about the anchoring.
- The structure is outdoors and exposed to wind, water or salt air, such as a dock, a rooftop or a pool terrace.
- You simply don’t have the time or tools. A professional will usually finish in a fraction of the time.
A good rule: if you would hesitate to hang a heavy kitchen cabinet on that surface yourself, don’t anchor a living net to it either.
Tools and skills checklist for DIY installation
Before you commit, check you have what the job needs.
Tools
- Drill or impact driver with bits suited to wood, masonry or metal
- Spirit level and tape measure
- Stud or joist finder
- Stable ladder or platform at the right height
- Pencil or marker for anchor points
- Spanners for tensioners and cable clamps, if used
Skills
- Confidence drilling into ceilings, beams or walls
- Ability to identify a load-bearing surface
- Patience to tension a net evenly around its whole perimeter
- A second pair of hands: most nets are far easier to fit with two people
If more than one item on this list gives you pause, a professional installation is likely the better choice.

DIY vs professional: how the costs compare
DIY saves the labour cost, but it is not free. Weigh both options honestly.
Labour: With DIY, you supply the labour, which typically takes half a day to a day. A professional installer quotes for the work, usually as a fixed price for the job.
Tools: Going DIY means buying any tools you don’t already own. A professional brings everything needed.
Structural assessment: When you install it yourself, you rely on your own judgement about whether the structure can take the load. A professional assesses it on site, drawing on experience.
Speed: A first DIY installation is usually slower. A professional typically finishes faster.
Risk if something goes wrong: With DIY, any problem is yours to fix. With a professional, the installer’s workmanship covers it.
Best for: DIY suits simple, accessible, residential projects. A professional is the better choice for work at height, complex shapes and commercial sites.
Finding an installer: the Feelnets craftsmen network
Feelnets works with independent craftsmen who install residential nets. Carpenters, builders and fitters can join as partners, so customers can be put in touch with someone who knows the products.
If you would rather not install the net yourself, mention it when you request your quote. Tell us where the project is, what the net attaches to, and send a few photos of the space. We will let you know whether a partner installer is available in your area.
Are you a tradesperson yourself? Learn how to become a Feelnets installation partner.
Frequently asked questions
Is it hard to install a mezzanine net yourself? Not for a confident DIYer with a solid structure to work with. The trickiest parts are finding sound anchor points and getting the tension even all the way round.
How long does it take to install a custom net? A standard mezzanine or balustrade net usually takes half a day to a day for a first-timer. Large, irregular or outdoor projects take longer.
Can I install a net without a load-bearing wall? Yes. A tensioned steel cable can create an anchor line where no wall or beam exists. It must itself be fixed to solid points at each end.
Do I need a professional for a net children will play on? Not necessarily, but the anchoring must be beyond doubt. If you have any uncertainty about the structure, a professional assessment is worth it.
Does Feelnets supply the mounting hardware? Yes. Hardware is chosen to suit your project and can be ordered with the net. Our mounting hardware guide explains the options.
Can a net be reinstalled after moving house? Often, if the new opening is similar in size and shape. Send us the dimensions and we can advise whether it will fit or needs adapting.
The bottom line
If the structure is solid, the opening is simple and you are handy with a drill, installing your own net is entirely realistic. If the job involves height, uncertain walls, a commercial site or children’s safety, bring in a professional.
Either way, it starts with a net made to the exact size of your space. Design your custom net or request a free quote, and tell us whether you plan to install it yourself. We will recommend the right hardware either way.